“How to use a stand assist lifter safely “
A stand assist lifter helps alleviate the physical stress on both the user and caregivers during transfers. Features such as ergonomic push bars, extra straps and handles can help to make transfers safer and more comfortable, but it is important to know how to use a lifter’s features correctly. This article will walk you through the steps of using one of our stand assist lifters safely.
What features should you look for in a stand assist lift?
The Invacare Stand Assist (ISA) patient lifter is a great option that provides highly adjustable, personalised transfer support based on the needs of your patient or loved one. The ISA lifter is compact and can be dismantled without tools, making transporting the lifter easy. The ISA’s curved legs also make manoeuvring around household items, like toilets and chairs, easier.
How do you use an Invacare sit to stand lifter?
It’s important to use equipment that is appropriate for the user’s needs. Stand assist lifters are designed for people who can bear some weight but are unable to do sit-to-sit or sit-to-stand transfers independently. It is also crucial to understand how to use your lifter correctly. Here’s how to use one safely:
Step 1: Prepare for the transfer
Make sure the person who is going to be moved with the lift is seated in an upright position. Move the lift over to the patient in preparation for step two.
Step 2: Attach the appropriate sling
Stand assist lifts come with different slings to suit different tasks and user needs. Invacare’s ISA lifter has two kinds of compatible sling available: the Stand Assist Sling and the Transfer Stand Assist Sling (which provides more leg support).
- The Stand Assist Sling is a two-point sling with back support and is designed for patients with adequate upper leg strength for standing.
- The Transfer Stand Assist Sling is a four-point sling that has back and leg support and is designed for patients who require more support and stability.
You should select the correct size sling for the person who will be donning the sling. Check the product guide, where you can find information on what size you will need.
Step 3: Using the sling
To use the sling, lower the extendable lifting arm towards the user so they can don the sling. The sling hook design means it can be put on one-handed. The hook design also prevents the sling from sliding out, reducing the risk of a fall.
There are three colour coded loops on each sling, which allow the sling to be adjusted to accommodate either a more upright or reclined posture. The four-point sling has additional loops (five loops in total) on the leg straps. Using these loops, transfers can be personalised to the patient. For more information regarding slings, watch our informative video here.
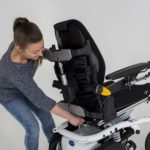
Step 4: Adjust the TelescoLift
The TelescoLift extendable lifting arm has nine different adjustments to accommodate people of varying heights and provide better support and comfort for the user.
Step 5: Adjust the ErgoSupport
The ErgoSupport lower leg cushion can be adjusted in six ways to perfectly support the user’s shin and calf. The ErgoSupport is articulated, which allows it to follow the natural movement of the lower leg during the sit to stand transition.
Step 6: Adjust any optional features
Optional features can be used to tailor the stand lifter to your needs. The adjustable foot plate is an optional feature that is adjustable to three different heights and has a removable heel block if needed. This allows the lift to be customised to suit users of all heights. Optional leg bands are also available for increased stability and lower leg support during transfers, and are both padded and machine washable.
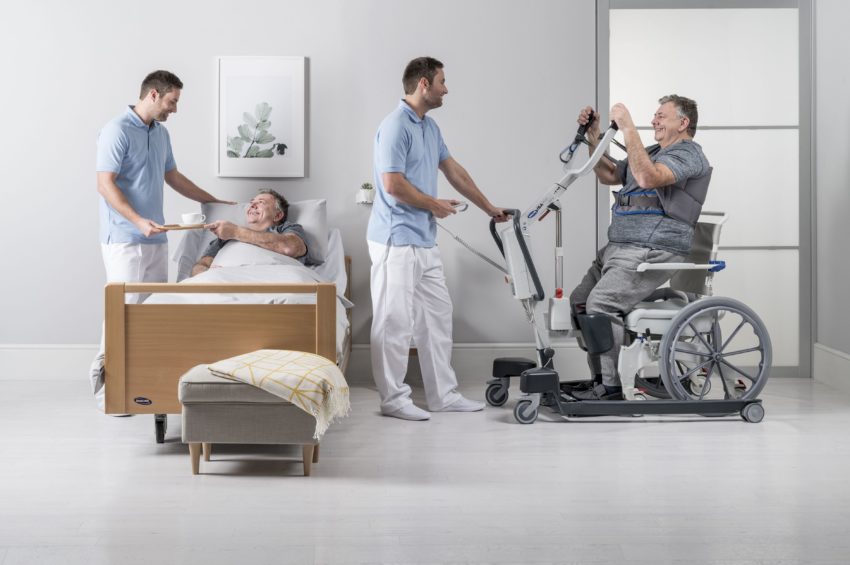
Step 7: Complete the transfer
When supporting someone to use the lift, you should provide clear instructions to them throughout the transfer. Let them know when the lift will start rising, when you will move the lift, and when you are bringing them down. Ensure that they are correctly using the ergonomic hand grips, which fit the curvature of the hand to provide a safer grip. Prompt them, if required, to push up with their legs, to help support their body weight throughout the transfer.
Find out more about the Invacare ISA Standard stand assist lifter
The ISA lift by Invacare comes with a range of features that make it both safe and comfortable for the user and assistant.
The Invacare ISA Stand Assist has roughly 82 lifts per charge, so you can get plenty of use out of it between charges. It has a base width of 635mm, with an internal width of 495mm when the legs are closed, and 960mm when they’re opened. This means it has a smaller turning circle of 1260mm, which combined with a ground clearance of 35mm, makes it ideal for using safely in smaller spaces.
The ISA lifter has a safe working load of 160kg, but if you require a higher specification, the Invacare ISAx Plus is coming soon with a 200kg safe working load.
For your peace of mind, the ISA comes with a five-year warranty on the frame, actuator and control box, as well as a two-year warranty on the handset and a one-year warranty on the battery. Want more information? Find out more about the Invacare ISA Stand Assist here.